
You can make some truly incredible art using old newspapers before they go in the recycling bin. If you don’t buy papers or get a free one, you can easily pick one up in a public place, or ask a neighbor ““ so these are perfect for cheap crafts, and they can look stunning despite being free!If you’re looking for some top newspaper crafts, we’ve gathered up some of the best ideas for you.
Watercolor Newspaper Flowers
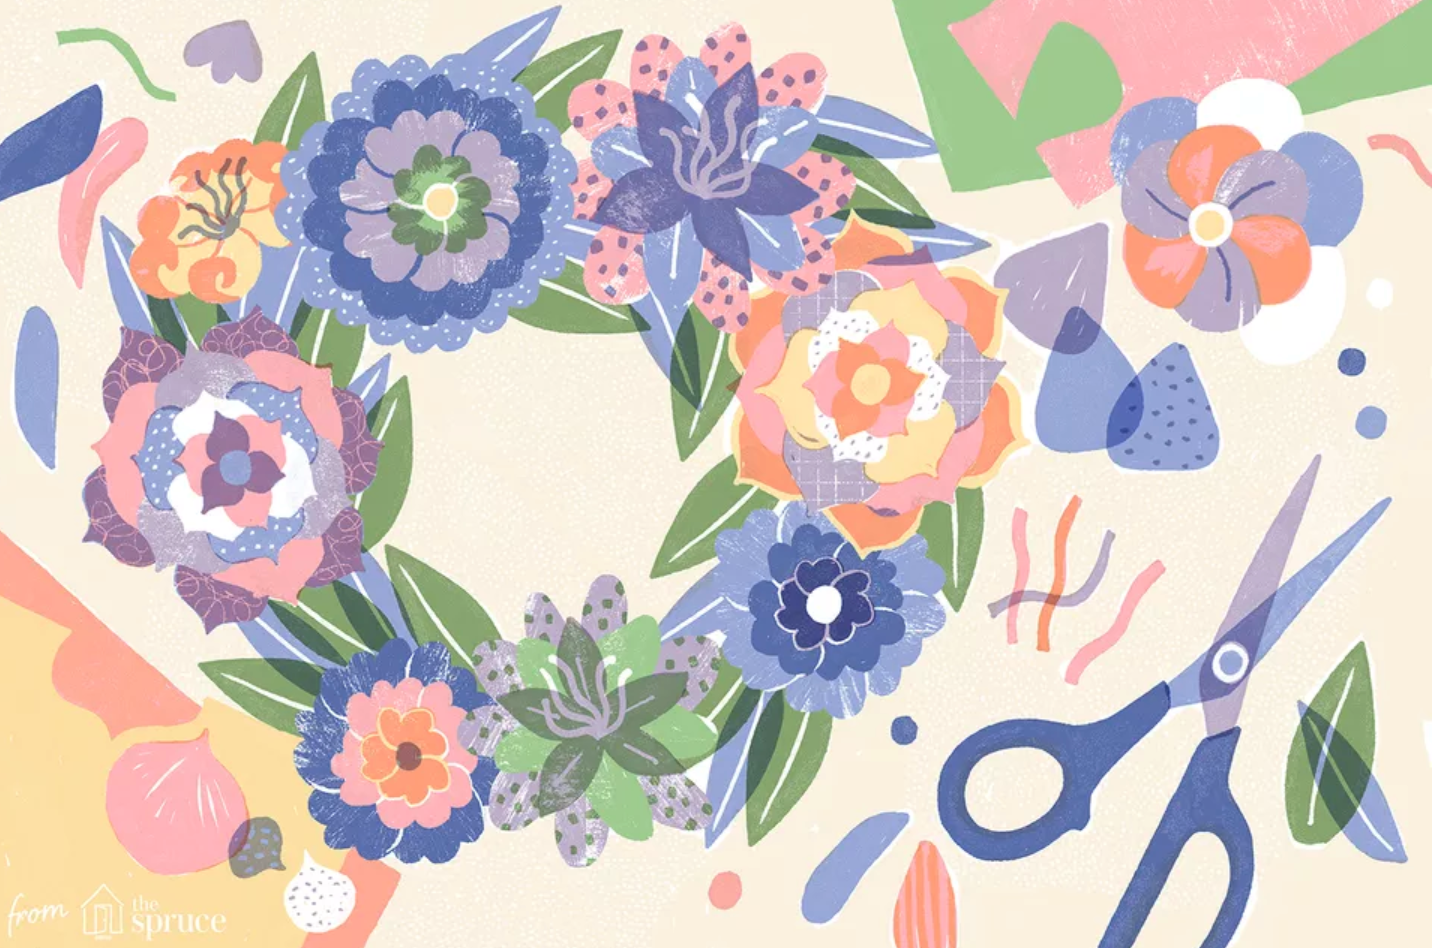 Source: https://www.thesprucecrafts.com/easy-diy-paper-flower-tutorials-4007906If you want a simple, vibrant, and gorgeous craft that you can complete in an afternoon, newspaper flowers are the one for you. Little kids will love doing these too, and they can make beautiful blooms to gift to friends or teachers or family members.
Materials
For newspaper flowers, you’re going to need:
- Newspaper
- Watercolors
- A paintbrush
- Scissors
- White glue
Step 1: Cut Out The Flowers
Cut some flowers out of the newspaper. You can cut “proper” petals or just loose, wavy lines; it won’t matter. You will still end up with some stunning crafts.Cut larger and smaller shapes, as you’re going to help your child layer these up when they’ve been painted.
Step 2: Paint The Flowers
Spread some scrap newspaper out to catch any drips, and then help your child paint beautiful abstract watercolors onto the flower shapes you have cut. They can use a whole mixture of hues, playing around with how the different colors blend.
Step 3: Cut Some Stems
Stems can be cut from newspapers as well, keeping the craft simple and minimalistic in terms of the required materials. You could use pipe cleaners or rolled paper instead if you want to make the flowers a little more robust.Get your child to paint the stems. They might choose to do them in greens, or keep them rainbow like the flowers ““ it doesn’t matter, as this is a bright and abstract craft that promotes experimentation.
Step 4: Glue The Flowers Together
When the paint is dry, glue the flowers together. Experiment and try different shapes and colors on top of other colors. Get your child to help you decide which pieces belong to which other pieces. You can also try gently crinkling up the paper to give the flowers a 3D effect.When you’re happy with the designs, glue them together and stick them to their stems. You can glue the newspaper flowers to a black or green background if you like, or just stand them in a vase as they are. They will need quite a supportive vase but will look lovely like this.One of the nicest things about this craft is you can do it for as long as you want, and stop as soon as your child gets bored ““ there are no rules, and any scraps can just go straight into the recycling bin. Wash the brushes, and you’re done with the cleanup, too!
Newspaper Letter
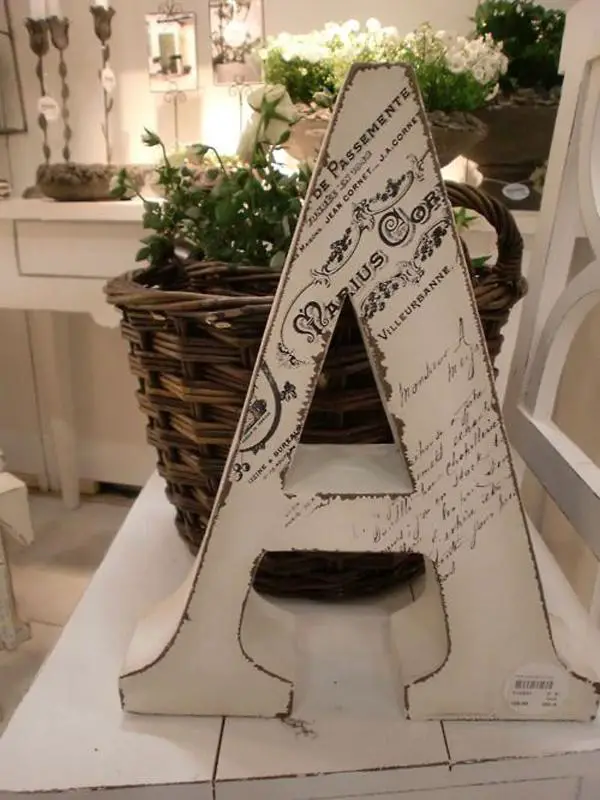 Source: https://www.cuded.com/35-creative-diy-letters-in-life/If you like the sleek, book-ish look of the newspaper, this is a great way to decorate, and you can do it with anything ““ but wooden newspaper letters are a lovely and simple craft that will show it off to its best.
Materials
You’re going to need:
- 1 wooden letter
- Black paper
- Pencil
- Scissors
- White glue
- 1 piece of stiff cardboard
- Spray varnish (optional)
- Decorations (optional)
Step 1: Choose Your Newspaper
As this is going to be a more long-term craft, you may want to select your newspaper story with more care; think about what you’d like to appear on the letter. Maybe you can find a story with your child’s name in it? They’ll think that’s great fun!You could also create a collage of different funny or interesting sentences. Whatever you want to do is fine, but try to choose something that’s at least somewhat meaningful.
Step 2: Glue The Paper On
Help your child to spread a thin layer of glue over the letter, and then paste the newspaper down carefully. To do this, you will want to use a piece of stiff cardboard so you don’t smudge the newspaper’s ink with your fingers. Use the cardboard to get a smooth, clean surface, and don’t press too hard or the paper might tear.
Step 3: Add Extra Designs
If you want to stick characters on the letter, you can cut them out of the black paper. For example, you might want to make a silhouette of your child or something that they like, especially if this relates to the writing on the paper.You can stretch this drawing across the legs of the letter, or cut out the middle to keep the shape of the letter clear. If you aren’t artistic, try cutting some simple shapes such as stars or a moon and overlapping these with the letter’s edges.If you prefer your newspaper letter plain, that’s fine too!
Step 4: Decorate (Optional)
Ask your child if they’d like to brighten up the craft with a bit of ribbon, or a few sequins. Newspaper crafts look their most elegant when they are simple, but a touch of color won’t hurt and can look great.Lacy white ribbon is a nice addition, as are bold splashes of a single hue. Play around with the aesthetics before you stick anything in place so you don’t ruin the work you’ve already done.When you’re happy with everything, glue the decorations in place, spray with varnish (spray prior to gluing on ribbons/fabric), and set the letter aside to dry before displaying it.
Newspaper Seedling Pots
 Source: https://www.cuded.com/35-creative-diy-letters-in-life/If you’re trying to get your kids interested in gardening, newspaper seedling pots are a fantastic craft to try with them ““ they’re easy, fun, and very practical as you can just plant the whole pot when the seedling is ready to go in the ground. They’re also brilliantly eco-friendly and need nothing but newspaper, tape, scissors, and something to shape the pot around, which you can do with a can of beans.
Materials
You’re going to need:
- Newspaper
- Scissors
- A cylinder of any sort (like a can of food)
- Paper tape
Step 1: Cut The Paper
First, you are going to help your child to cut a single newspaper sheet into two halves. Fold the pieces into thirds, keeping the length.
Step 2: Wrap Around The Can
Start wrapping the newspaper around the can, with the end of the newspaper sticking about a quarter of an inch off the can so you can fold the bottom over in a minute.Get your child to help you with this. You don’t want it to be too tight, because you’re going to slip the newspaper off of the can when you’ve finished.Stick the end with compostable paper tape. This will stop you from ending up with nasty bits of sellotape in your soil when you later plant the pots. If you don’t have compostable tape, you can use normal tape and tear it off the pots when you come to plant the seedling in a bigger pot, but it’s annoying.
Step 3: Fold The Bottom
Straighten any creases out of the part of the newspaper sticking out, and then get your child to press one edge in. This is the first fold. On the other side, press the edge in. You should then be able to fold the two sides into place. This absolutely doesn’t need to be neat!!Add a strip of compostable tape to the bottom, and slide the pot off the can. You now have a newspaper pot for planting seedlings in!
Step 4: Fill And Plant
Get your child to help you fill the little pot up with some compost, and then sprinkle your seeds in and follow the care directions on the packet. Remember that you’ll have to handle the pots carefully if you need to move them, as the damp newspaper will tear easily.You can also write the name of the plant on the paper using a marker pen, which is perfect if you have a tendency to mix seedlings up. Adding the planting date is a good idea too.
Pirate Swords
 Source: https://alphamom.com/family-fun/holidays/talk-like-a-pirate-day-crafts/The kids’ ears probably just pricked up ““ and yes, you can make swords out of newspapers! It is surprisingly durable if folded right and these are nice, safe swords for kids to play with. They also look great, and you can add a lick of paint if they aren’t sure about having words printed on their pirate blade.
Materials
You’re going to need:
- Newspaper
- Scissors
- Tape
- Cardboard
- Pens
- A glue gun
- Silver paint (optional)
- Gems (optional)
Step 1: Roll The Paper
This craft starts by rolling up your newspaper. Layer up two or three sheets of newspaper, and then take the corner and help your child start rolling it. You want a nice, tight roll as this is going to be the blade of the sword.It should be reasonably robust, but won’t be capable of hurting anyone.Roll along until you reach the end, and then use tape to pin the edges. If you are going to paint the blades, use masking tape so that you can paint over them.
Step 2: Make The Handle
If your sword has turned out long enough, you can bend one end of it around to form a curved handle. If you want it longer, use a second rolled sheet of newspaper to make a handle.You are essentially going to stick a “C” shape of newspaper from the bottom of the sword to a generous hands-width up the blade. Your child will be able to use this to hold the sword. Tape it in place firmly so it won’t come undone (or use glue for a stronger seal).
Step 3: Make The Guard
The sword won’t look complete without a guard to protect your child’s hand from vicious enemy swords. Get your piece of cardboard and help your child cut an oval shape out of it. Add a second hole in the center that is wide enough to thread the blade through.Let your child decorate this using pens or paints. You can help them draw fancy patterns on it if you like, or just help them paint it gold or silver so it looks like metal. Slot the oval over the blade.
Step 4: Add A Collar
To stop the guard from sliding around, you’re going to cut another small rectangle of cards and let your child decorate it. Next, glue this tightly around the blade, fixing your guard in place between the handle and this collar. This will also give the sword a little more rigidity at the base.
Step 5: Add Gems And Paint (Optional)
If your child wants to include some stick-on gems, they can now do so. This is a great way to make the sword feel glitzy, but you don’t have to do it if you want to keep the craft quick and simple. Equally, painting the blade of the sword is optional. Most children won’t care if it’s a newspaper, as long as they can swing it at people!
Newspaper Autumn Leaves
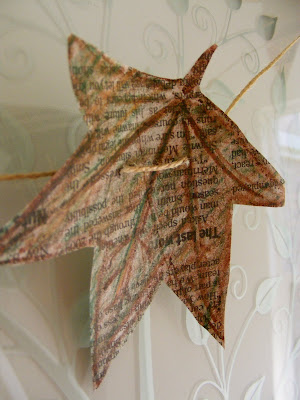 Source: http://villicanamomma.blogspot.com/2009/09/newspaper-leaves.htmlAutumn leaves are great fun to craft, and these can be a really simple choice for your child to do on a wet afternoon.
Materials
You’re going to need:
- Newspaper
- Scissors
- Glue
- Paints
- Paintbrush
- Orange or red yarn
Step 1: Cut Out Leaves
Cut out some leaf shapes from the newspaper, in all different sizes and shapes.
Step 2: Paint The Leaves
Help your child paint the leaves in beautiful colors. They should choose mostly reds and oranges to make them look autumnal, but they can get as creative as they want ““ rainbow leaves can be beautiful too, and as long as they are having fun, the craft is a success.
Step 3: Hang Up The Leaves
Glue the leaves along your colored yarn, and then hang the garland up above a door or along a wall to make the most of the beautiful craft. These look very lovely with light shining through them to pick up the newspaper print, so in front of a window is also a good location.
Conclusion
Newspapers are almost endlessly versatile, and they are super easy to get hold of. They are also cheap (or free), and make light, simple, elegant crafts. It’s easy to tidy away a newspaper craft for another day, and you can just throw the scraps in the recycling bin!
Comments
0 comments