
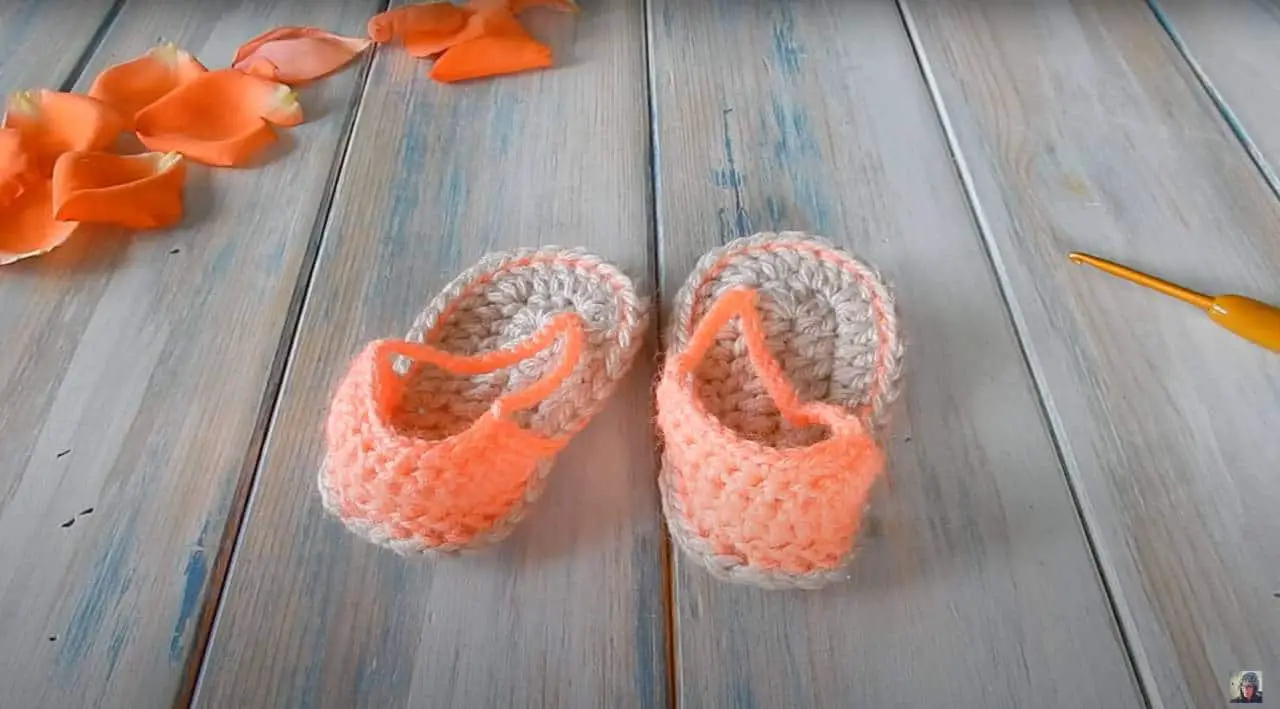
Choosing what to make for a newborn baby can be very difficult, and while you could just buy a gift voucher or send a onesie, homemade gifts are so much nicer. How do you know what to make, though?If you’ve ever seen baby crocheted sandals, you’ll know that they are one of the cutest things in the world, and luckily, they’re also really easy to make, even for someone who is not very experienced with crochet. You can choose yarns that will perfectly suit the parents’ tastes, or even match them to a favorite outfit.Add flowers, gemstones, butterflies, hearts, or just fancy patterns ““ you can do anything you like with these! Just make sure there aren’t any parts that could be pulled off or swallowed.
Crochet Baby Flip Flops
 Materials
For your baby sandals, you’ll require:
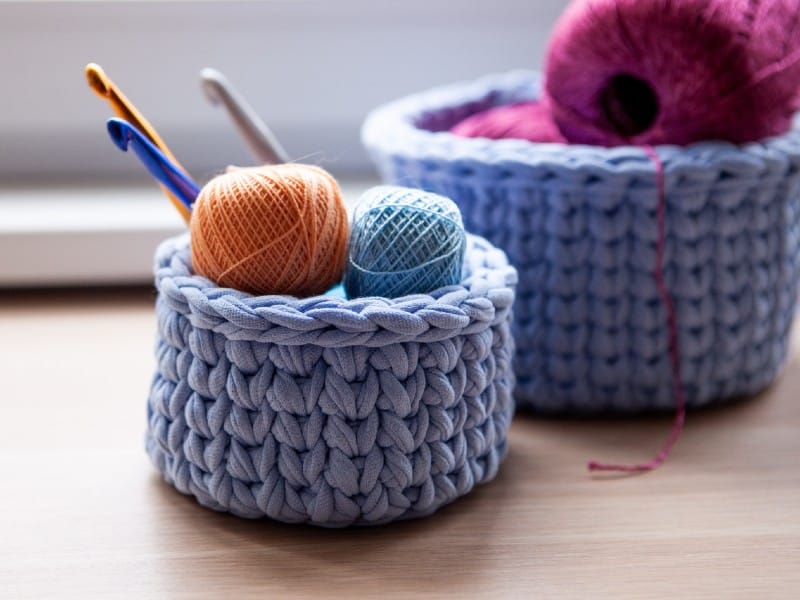
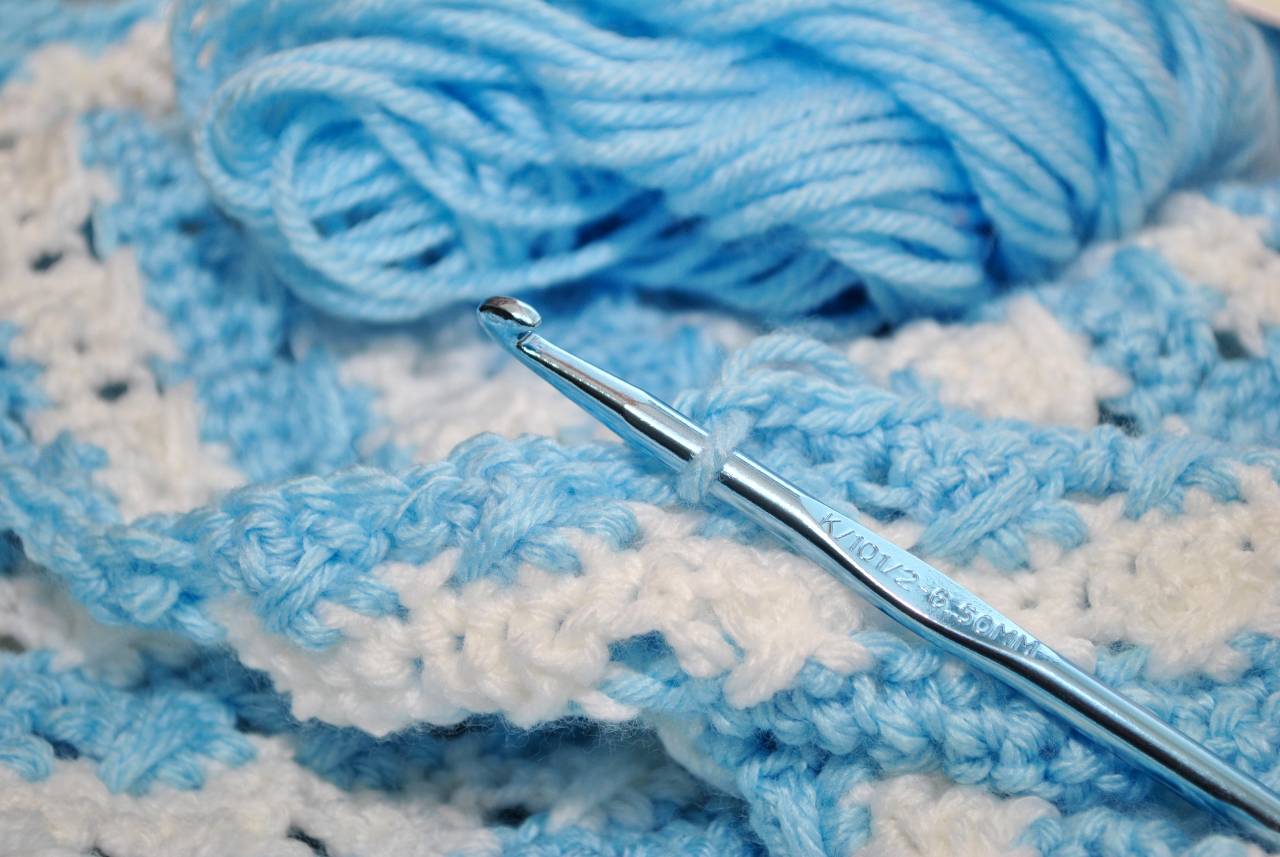
- A 3 mm crochet hook
- 1-2 skeins of thin yarn in the color of your choice
- Scissors
- A yarn needle (for weaving the ends in)
- Sewing threads (matching/complementary colors to your wool)
- Colored stitch markers (not necessary but can be useful for counting)
Step 1: Starting The Sole
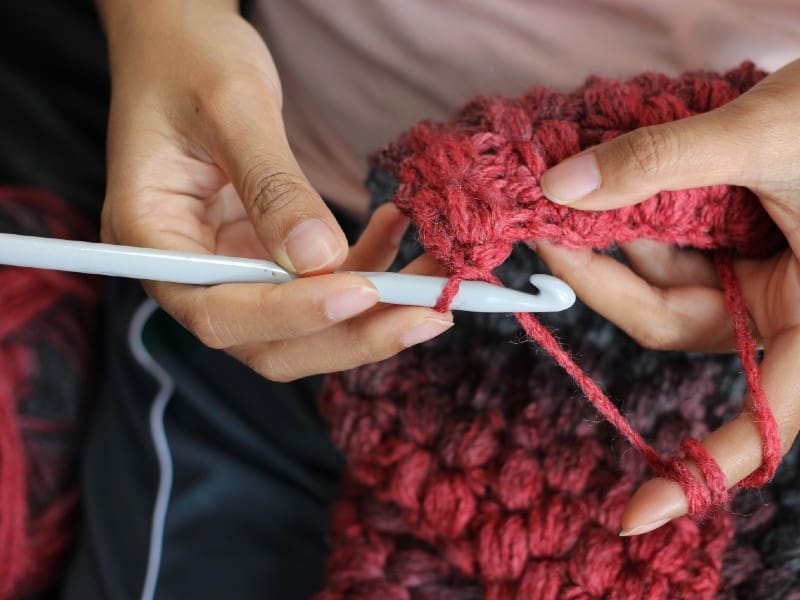
Get the end of both of your skeins of yarn and line the ends up. You are going to be crocheting using both skeins at once. Create a slip knot and chain thirteen. Check your count.Count back two stitches and double crochet into the third chain. Make a second double crochet in the same stitch.Make a double crochet (just one) in the next nine chains, so that you are back at the start of your chain. In the final stitch, you are going to make five double crochets. You will see the yarn start to curve around to form an end to the sandal.
Step 2: Continue The Sole
Now, going along the other side of your chain, you are going to make a double crochet in each of the nine stitches, just as you did before. Count as you go to make sure you are getting your numbers right.Next, make two double crochets in the last stitch. This will bring your total up to five on each end.Slip your hook into the third stitch and do a slip stitch to join the round.
Step 3: Second Round Of The Sole
Chain one and then make two single crochets in the first stitch. Make two single crochets in the next stitch.Following this, make a single crochet in the next four stitches, and then make a double crochet in the next five stitches.In the following five stitches, put two double crochets in each. You should see this working its way around the end of the oval, enlarging the size of the sandal’s sole.Make a double crochet in the following five stitches. In the next four stitches, put a single crochet. You should be able to see how this pattern is the reverse of the one you just did on the other side; it’s making a wider end of the sandal for the baby’s toes, and a narrow end for their heel.Make a further two single crochets in the next two stitches. This will have brought you back to the heel of the sandal and you can join the round with a slip stitch in the first chain.
Step 4: Third Round Of The Sole
We still need a bigger sandal, so it’s time to do another round. Chain and then make two single crochets in the first four stitches.In the next nine stitches, put a single crochet in each. You are moving back toward the toes of the sandals, where you need to increase again.In the next 10 stitches, put two single crochets. Count to check you have done it correctly, and then put a single crochet in the following nine stitches. You should be back near the heel of the sandal.For the next four stitches, make two single crochets in each.You should now be back at the heel. You can slip stitch into the first stitch and then cut and tie off the yarn. Make sure the knot is tight so the sole cannot unravel. You can weave in the end using your yarn needle now or do it later.
Step 5: Make Three More Soles
You will need to make three more of these little soles for the baby sandals. That’s because you’re going to pair up and have two soles on each sandal; this is where the sewing thread comes in.
Step 6: Sew Soles Together
 Pair up two of your soles and get your yarn. A complementary color is a good choice but you can just use the same color. You can also use a glitzy thread if you want to make the sandals sparkly; simply pair it up with the yarn and follow the instructions for the yarn.Line your soles up and find the first stitch in both. Use your hook to pull a loop of the yarn through the first stitch. Trap the end of the yarn under your finger on the other side so it doesn’t pull through.With the loop still over your hook, push the hook through the second stitch in both soles and pull another loop of yarn through. You should now have two loops on your hook. Slip stitch.Do this in the third stitch, slip stitching it to your current loop, and then repeat this around the sole. Check your sandals are lined up.When you finish the round, cut your yarn and thread your yarn needle, using this to finish the border and make sure the two soles are well joined. Weave in the ends.Repeat this for the other pair of soles.
Step 7: Make The Back Of The Upper Sandal
There are lots of different fastener options, but flip-flops are cute and easy. Face your sandal away from you, so that the heel is closest to your body. Count eight stitches from the backstitch of your sandal to the right. Slip your hook through this stitch, and then through the seventh stitch, so the sandal is looped on your hook.Pull a loop of yarn through and chain one. Loop your yarn over the hook and push it back through the eighth stitch, coming out through the seventh. Hook another loop of yarn through to get the third loop on your hook and then double crochet.Loop your yarn over, put your hook through the seventh stitch and into the sixth, pull another loop through, and do a double crochet between the seventh and sixth stitch.Do the same between the sixth and fifth, fifth and fourth, etc. You should get to eight when you reach the back of the sandal.Now work eight stitches in the other direction, doing the same thing, so that you have eight double-crochet stitches on either side of the heel, 16 in total. Check the sides line up. You should now be at the left-hand side of the sandal.
Step 8: Continue The Back Of The Upper Sandal
Turn your work but do not chain one. Skip the first stitch and double-crochet it into the second stitch. Go right around, so you should complete 15 double crochets (as you skipped one of the original 16).When you reach the end, turn, skip the first stitch, and double crochet in the remaining 14.When you reach the end again, turn, skip a stitch, and do a single crochet in all the remaining stitches.
Step 9: Make The Strap
We are going to start with the left-hand shoe.Chain 13 stitches. Locate four stitches at the center of the sole, and push your hook into the fifth stitch on the right-hand side. Slide it through so your hook comes out of the fourth central stitch.Hook the yarn through and slip stitch. Chain 15 and then you can hook on to the other side of the back of the sandal, by slip stitching into the topstitch.
Step 10: Make The Other Strap
To make the right-hand shoe, you need to go into the left-hand side of the sole, so you will need a slightly longer strap initially. Instead of chaining 13 stitches, you should chain 15, and then locate the four stitches at the center, and push through from the fourth to the fifth. Slip stitch.Chain 13 to hook back onto the left-hand side of the shoe. Slip stitch and cut your thread.Use your yarn needle to weave in any loose ends.
Step 11: Decorate
Now that your flip-flops are finished, you can personalize and prettify them. Add buttons or stitch different colored threads through the sole or straps using a needle and thread. You could even embroider the baby’s name on the sole if you want. Consider crocheting some flowers to adorn the flip-flop straps.Just remember that anything you want to add should be very secure, so curious little fingers can’t pull them off as they could pose a choking hazard! If you’re going to include glittery threads or different colors, remember that the sandals will be filled with cute little feet a lot of the time, so these may be best done on top.
Conclusion
Baby sandals are perfect for summer, and you can simplify this a bit by not making the double sole and stitching it altogether if you prefer; one sole should be enough for a light little flip flop. However, a double sole looks better and will last longer, so if you have the time, it’s better to create them like this.Parents will love receiving tiny flip-flops for their newborn, so these are a perfect baby shower or birthday gift, or you can crochet a pair for your own little one. There are many other styles and options if you want something more elaborate than a flip-flop.Source: https://www.youtube.com/watch?v=zshaRw690Sk
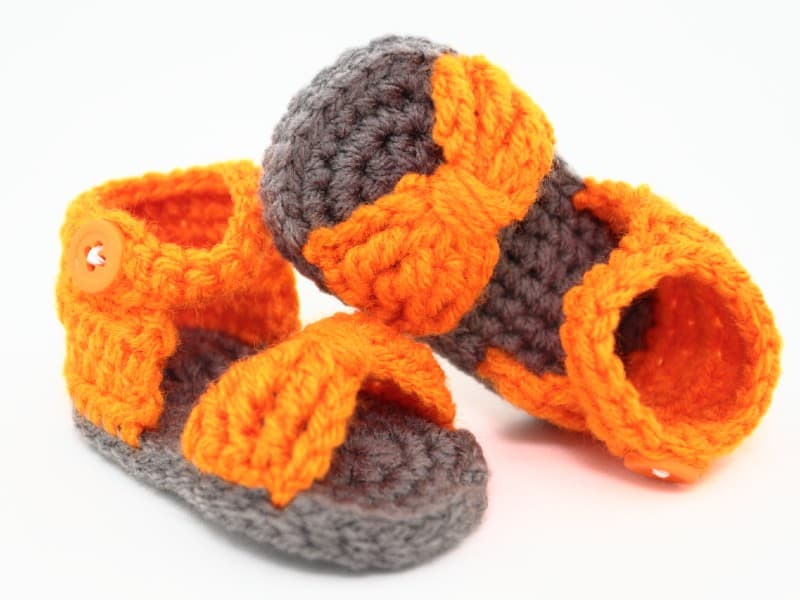
Crochet Baby Two-Strap Sandal
Source: https://www.youtube.com/watch?v=rJM8xy4wZmE
Materials You’ll Need:
 For your baby sandals, you’ll require:
- A 3 mm crochet hook
- 1-2 skeins of thin yarn in the color(s) of your choice
- Scissors
- A yarn needle (for weaving the ends in)
- A sewing needle
- Some thread (for attaching the buttons)
- Four buttons
- Glue
Step 1: Make Your Chain
Grab a ball of yarn; we are going to start with the sole, so if you’re using different colors for the upper part of the sandal, make sure you are using the right color for the sole. You can double up the yarn if it’s thin, or just use a single strand.Start with a slip knot and chain 10 stitches.
Step 2: Begin To Create The Sole
This is going to form the center of the sole. You’re now going to start shaping the sole itself. To begin, do two double crochets into the chain next to your hook.Next, put double crochet in each of the next seven chains; this will take you back to the end of your chain, except for the last stitch.
Step 3: Begin Wrapping The Sole Around
In the last stitch of the chain, you’re going to do a full seven double crochets. You will see that this quickly gives you a wide, rounded edge to the sole of the sandal.You are now going to work up the opposite side of your original chain. You started at the top of it and have worked your way down; now you’re going to work your way back up.Put a double crochet in each of the next seven stitches, just as you did on the other side of the chain. When you reach the last stitch, do three double crochets in it. Do a slip stitch into the first double crochet of that round (the very first double crochet you did, in Step 2).You’ve finished the first round of the baby sandal sole! However, this is too small even for a baby’s foot, so we need more rounds.
Step 4: Round Two
Chain two, and then do a double crochet in the first stitch, and two double crochets in the second stitch and the third stitch. Work a single double crochet into each of the next seven stitches.Work two double crochets into the next six stitches. Again, you should be able to see the sole broadening and taking shape under your hands.Do a single double crochet in the next seven stitches. You should be nearly at the start of the round again, and you just need to do another two double crochets in the last three stitches.Finally, do a slip knot into the first double crochet of the round, finishing this round.
Step 5: Round Three
Again, start Round Three by chaining two. Do a double crochet in each of the first three stitches, and then two double crochets in the fourth and fifth stitches.Do a double crochet in the following 11 stitches. Next, you want two double crochets in the next nine stitches. Follow this with a double crochet in the next 11 stitches, and two double crochets in the final three stitches.End on a slip stitch into the first double crochet of the round.Your sandal sole is now looking great and should be a good size for mini feet to slip into. It’s amazing how fast this shoe grows, but you do only need three rounds to form the sole.
Step 6: Begin Strap One
We are going to start by creating the front strap of the sandal. Your hook is currently at the front of the sandal. To get to the right place, you need to work seven slip stitches to the left.When you get there, chain 16. If you are making this for a very small baby, you can chain fewer stitches, but remember that the baby’s feet will grow, and the sandal doesn’t need to fit too snugly; as long as it stays on the baby’s foot, it will work.If the baby’s feet are big, it may be worth adding a few more to the chain to ensure the strap will fit.Once you have the chain at the right length, you’re going to attach it to the other side of the sandal, in the same position so that the strap will be level. You can count seven stitches to the right (from the central point) or just line it up by eye.Slip stitch to anchor it to the other side of the sole.
Step 7: Continue Strap One
Do two slip stitches into the sole, working away from the front of the shoe. Do a double crochet into the first loop of the chain you just made. Do a double crochet into each stitch of the chain. This is going to thicken the strap and make it look sturdy.When you reach the other side and each chain has a double crochet in, count two stitches along the sole and slipstitch and anchor the strap in the same place as you did on the other side. The first strap is now finished!
Step 8: Begin The Second Strap
You’re going to do nine slip stitches, working toward the back of the sandal. Count carefully to make sure you get the distance correct.Chain two, and then do a double crochet into the next two stitches of the sole. Chain two more, and then turn around, and double crochet into the two stitches you have just made.Chain twenty. Again, you can increase or decrease slightly to allow for bigger or smaller feet. Put a double crochet into the seventh chain. This will provide you with a buttonhole.Next, put a double crochet in all of the chains leading down from this seventh chain. Again, this will make the strap thick enough.When you get back to the place where you begin your chain, you should have two stitches running horizontally where the yarn joins. Run two double crochets into each of these stitches.This should produce a right-angled shape, with your chain coming off to the side. This right angle is going to be a vertical part of the strap.
Step 9: Continue The Second Strap
Chain 18 more stitches. Do two double crochets into the third loop of this chain, and then carry on back down the chain, putting a double crochet into each loop.You should now be back at the point where you made your right angle. Find the row located one below the top of this vertical strap, and slip stitch into it. Your vertical strap should now lead to two other straps.Check your connection is secure and then cut the yarn and pull through to create a knot.
Step 10: Create A Connecting Strap
At the same level, on the other side of the sole, you’re going to make another vertical strap. Take your yarn and connect it by weaving the end into the underside of the sole (or knot it). At the top, chain two, and then put a double crochet in the next two stitches, moving toward the front of the sandal (where your other strap is).Chain two, turn, and double crochet in the two stitches you have just made.Take the end of the strap you made previously, which should curl around the back of the sandal. Slip stitch the end of this strap to your new vertical strap, working up its short edge and slip stitching into each stitch. Turn around.Do a double crochet in each of the top two stitches of your new strap. This should give you a neat anchor point, finishing the back of the sandal so it will stay on the baby’s foot.
 Step 11: Add The Buttons
Choose two buttons that complement your color, and then sew one against the vertical strap you have just finished. Make sure it will fit through the buttonhole you made on the loose strap, and then spend some time sewing it very firmly into place.You should then sew a matching button on the front strap of the sandal to make it match (it doesn’t need to fasten as the baby’s foot can just be slipped in).Add a bit of glue to the underside of both buttons to ensure they cannot be pulled off or come loose, even if the baby tugs or bites at them.
Step 12: Repeat The Process For The Second Sandal
Obviously, the baby will require a pair of sandals. You should repeat this process, but work the straps in the opposite direction so that the fastener is on the other side. If you find this tricky, don’t worry too much; the parents won’t mind and the baby won’t know if one sandal fastens on the wrong side, so you can just repeat the pattern if that’s easier.
Step 13: Add Further Accessories
If you want, you can add other buttons, threads, or decorations to the sandals to make them pretty and summery. Glittery threads or threads in a contrasting color can be woven through the straps or used to create a border; simply sew them into place.Make sure any stick-on accessories are attached very firmly so that there is no chance of the baby pulling them off and swallowing them or choking.
Step 14: Weave In The Ends
Grab your yarn needle and weave in any loose ends so that they become invisible. Because the pattern is almost continuous, you shouldn’t need to weave much, but make sure any joins are tidy and as invisible as possible before you finish.
Conclusion
Baby sandals are wonderful summer wear, and perfect for a cute, homemade gift, or as an addition to your own child’s wardrobe. You can make them in as many designs and colors as you like, and have as much fun as you want.Try multicolored yarns for a more colorful look, or change color partway through the sandal; this can be done neatly and simply with a little practice and will let you do straps of a different color to the sole.Essentially, have fun and come out with some beautiful baby footwear that lets those cute toes breathe!
Comments
0 comments