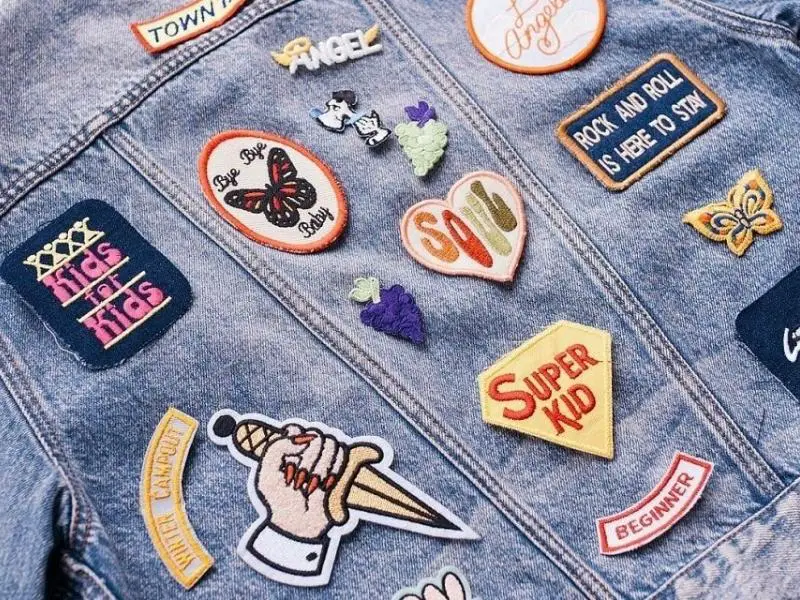
Patches are no longer just a solution to fix a torn spot on a jacket or help to cover a stubborn stain that might never get off your clothes.
They’ve recently become wildly popular among younger generations as displays of their interests and loved art forms.
And unlike the old days when moms could only sew in a patch using needle and thread, there are many ways to attach patches nowadays.
So, in this article, we’ve included a variety of techniques for how to use different methods to perfectly attach various kinds of patches, some tips and tricks, and ideas on where to best place these patches.
No-Sewing Patch Attaching Methods
Time has evolved, and yes, there are now a variety of no-sewing techniques to attach a patch to your favorite backpack or piece of clothing and show off your craftsmanship. Here are a few of them:
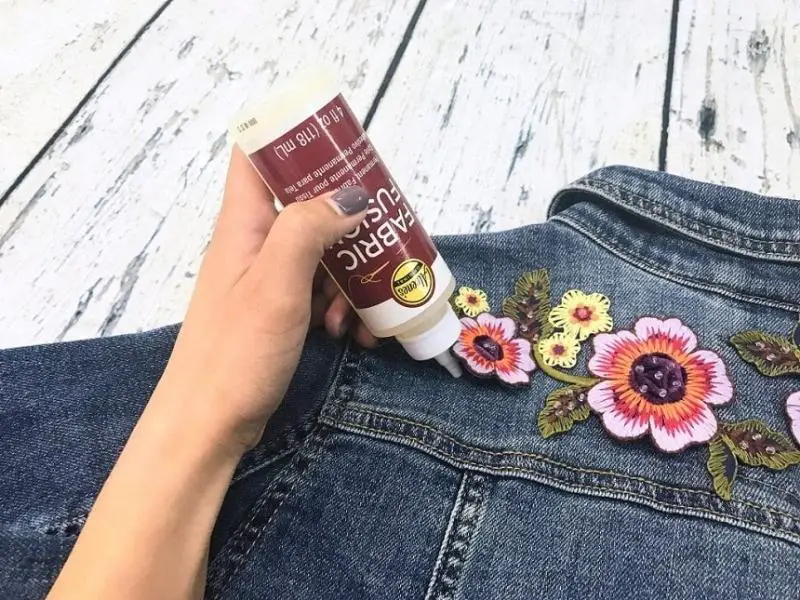
1. Fabric Adhesive
Fabric adhesive works by fusing two different types of fabric. And, unlike glue, it’s permanent, so it’s a great choice if you don’t have an iron or a heat press and need to apply patches without sewing.
Fabric adhesive can also be used to secure lightweight patches to delicate materials, and it’s really convenient for working with synthetics that can’t withstand heat.
However, make sure to test the glue on a small piece of fabric before you begin and to make sure there isn’t any dissolving, puckering, and fading colors.
Also, don’t forget to start with a clean, dry garment and carefully follow the adhesive directions to get the best results. Finally, allow the adhesive to dry for at least one night before putting it on.
2. Hard Hook and Loop Tape (Velcro)
Hard hook and loop tape, most commonly known as Velcro, is one of the easiest and most practical ways to attach patches.
It’s also one of our favorites because it allows you to switch the patches up whenever the mood strikes you.
For this method, all you have to do is apply a fabric adhesive to the back of the hook, place it wherever you want, then press on it with your hand for a few seconds to be sure it’s perfectly glued.
Then, apply the fabric adhesive on the back of the loop, stick your patch to it, and press again for a few seconds to ensure it’s well stuck.
Finally, attach the hook and loop together, and voilà , you’ve successfully attached your patch!
For the best results, choose Velcro that has a self-adhesive backing to save yourself some time.
3. Fusible Web
A fusible web is technically a heat-sensitive glue. In other words, it’s a sticky sheet that melts when exposed to heat, so it’s perfect for attaching patches to your favorite fashion item with no sewing involved whatsoever.
There are several types of fusible webs available on the market. Some have a paper on one side, others have a paper on both sides, and some come with no paper. We strongly recommend going for the two-paper option simply because it’ll allow you better control over the shape of the glue strip.
To attach patches using this method, place your patch over the fusible web sheet and use a pencil to draw its shape. Then, cut around the shape, remove one side of the paper and stick it to the patch using an iron or a heat press on low heat.
Lastly, remove the paper from the other side and apply it to the fabric using low heat.
4. Glue Guns
Ever considered using glue guns to attach your patches? We’ve thought about it, too. And it actually works! You just need to know how to select the correct type of glue gun and how to correctly use it for the best results.
There are three main types of glue guns: standard temperature (also known as high temperature), low temperature, and adjustable temperature glue guns.
Low-temperature glue guns work at roughly 260° Fahrenheit, whereas standard-temperature ones work at around 380° Fahrenheit.
That 120° differential can mean the difference between an excellent fabric bond and your material burning through. So, low-temperature or adjustable-temperature glue guns are highly recommended when gluing fabric or other sensitive materials.
Also, unless you’re using an adjustable-temperature glue gun, you’ll need to match the type of your glue stick to glue gun temperature.
So don’t use a low-temperature glue stick with a high-temperature gun or vice versa.
5. Clutch Pins
As you can guess from the name, this method allows you to pin a patch to the fabric rather than gluing, sewing, or ironing it in.
When making patches with pin backings, the flat part of the pin is inserted easily between the patch and the backing, while the pointy part of the pin is left out. The pin can then be inserted into the fabric and secured with a backing.
6. Hair Straightener
Another way to heat-press logos or patches without using an iron is actually using a hair straightener. If you have a hair straightener handy, you can use it as you would any iron or a heat press.
It’ll perfectly adhere your patch or logo to the fabric with very little chance of it coming off. Just be careful with the temperature of the hair straightener, as every type of patch would require a different temperature to be successfully applied on the fabric. And, of course, remember that not all fabrics are heat-tolerant.
7. Double-Sided Adhesive Sheets
Double-sided adhesive fabric sheets are pretty convenient to use; you simply cut this adhesive sheet to any shape or size according to the patch you have. Then, stick your patch on one side, stick the other on your garment, and you’d be all done!
Also, they’re suitable for most fabrics (even leather!), are non-toxic, machine washable, and safe to use for the little ones. So you can even include your kids in this artsy DIY project.
8. Local Tailor
If you don’t have the time or interest to attach the patches yourself, the most straightforward approach would be completely washing your hands off this project and handing it over to your trusted local tailor.
Not only will it save you a lot of time, effort, and hassle, it’ll also grant you complete control over the process, from the placement of the patch to the type and color of thread used to attach it.
Patch Types
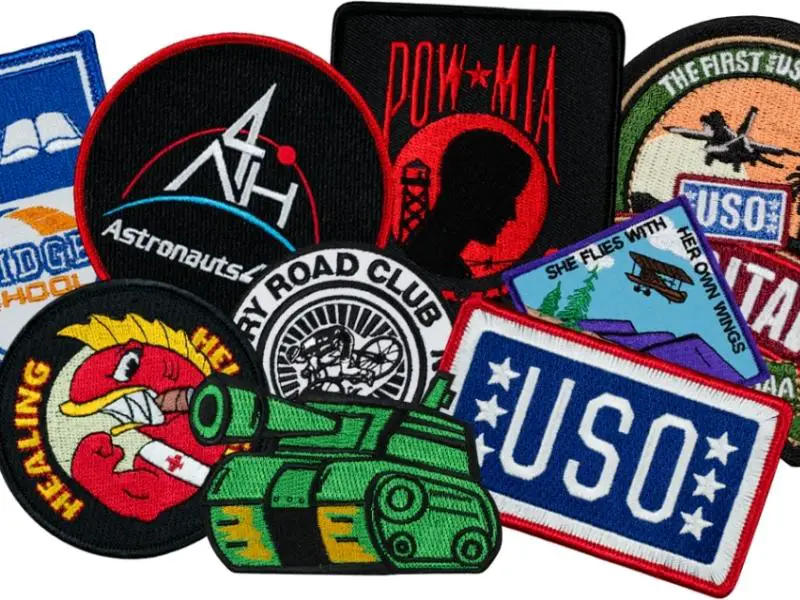
There are several types of patches you can use to adorn your fashion items, and each type might have a specific attaching technique. So, to help you decide which ones to get, here’s a list of them.
Iron-on Patches
Iron-on patches are some of the most convenient types to use, and they often come in packs, so they’re a great value for money.
To attach them, all you need to do is follow the instructions on the pack, then attach them using a heat press or an iron. However, keep in mind that some fabrics shouldn’t be exposed to heat, so make sure to research whether the fabric you plan on attaching the patch to can actually withstand heat.
Custom-Patch Lapel Pins
Lapel pins are a great way to attach a patch to your clothing; they have one or more pins glued into the back and are held in place by a butterfly clutch, also known as a lapel pin.
The pin backs are similar to the backs of earrings and are easy to apply and remove, so they take literally no effort.
They also come in various shapes and sizes, making it simple to select one that complements your outfit, as it’s an easy way to add patches to pretty much anything.
So if you’re looking for a simple, quick, and easy way to take your fashion style to the next level, this just might be it!
Pin-Backing Patches
These patches are pretty straightforward to use, and they allow you to replace, reapply, or switch the patch around whenever you feel like switching things up.
For example, you can glue the pin onto the back of the patch using hot glue, and voilà , you’ve got yourself a stunning patch in no time at all.
Magnetic Patches
As the name suggests, these patches feature solid magnets that’ll help you attach your patch without having to pin it, stick it, sew it, or heat seal it.
These patches attach and detach from any fabric quickly and with no effort, and they’re the easiest patches to remove and reattach whenever needed.
Peel-N-Stick Patches
Also known as self-stick patch backings, these patches are made of a sticky solid adhesive. So when you want to attach these patches to any fabric, all you have to do is peel away the paper backing and press the patch hard onto the garment.
Button-Loop Patches
Patches with button loops are a fantastic invention! A button loop is a little string loop glued or sewn into the top of the patch, which allows it to be hung from a button rather than stitched or pressed onto the shirt. They make your custom patches more adaptable and will look great, especially if used as custom logos.
Patch Attaching Tips and Tricks
Here are a few things to keep in mind before starting this craftsy patch-attaching project of yours.
Patience
Attaching patches isn’t a complex process at all, but one little mistake can cost you your favorite piece of clothing. So you always need to take your time to avoid any accidents.
For example, you might decide that you’d like the patch a little to the left after having applied the adhesive, which is fine and all, but most adhesives leave stains on the fabric.
So, it’s best to take a few more seconds to ensure that the patch placement is right where it needs to be before taking any action.
You might also be in a hurry and decide it’s a good idea to crank up the heat of your iron. Again, this might work well, or it might end up burning the fabric. So just invest a few extra seconds to save your clothes from ruin.
Material Type
The type of fabric you’re attaching the patch to will determine which method to use, especially when it comes to methods that require applying heat. So make sure to do your research before deciding which method to opt for.
Delicate fabrics are the most challenging because they can withstand little to no heat. On the other hand, heavier materials like wool and cotton are the most accessible because they can endure high temperatures and provide the best support for appliques and embroidery patches.
Patch Placement
There aren’t any rules set in stone for where you can attach your patches. However, some patch placements draw more attention than others. These include:
- The shoulder or chest regions on hoodies, t-shirts, or sweatshirts
- The back of a jacket
- Midway down on the front of a jacket
But if you are trying to fix a hole in the fabric or hide a permanent stain, you won’t really have much choice. You’ll just choose the applicable patch size to the size of the hole or stain and place it there.
Frequently Asked Questions
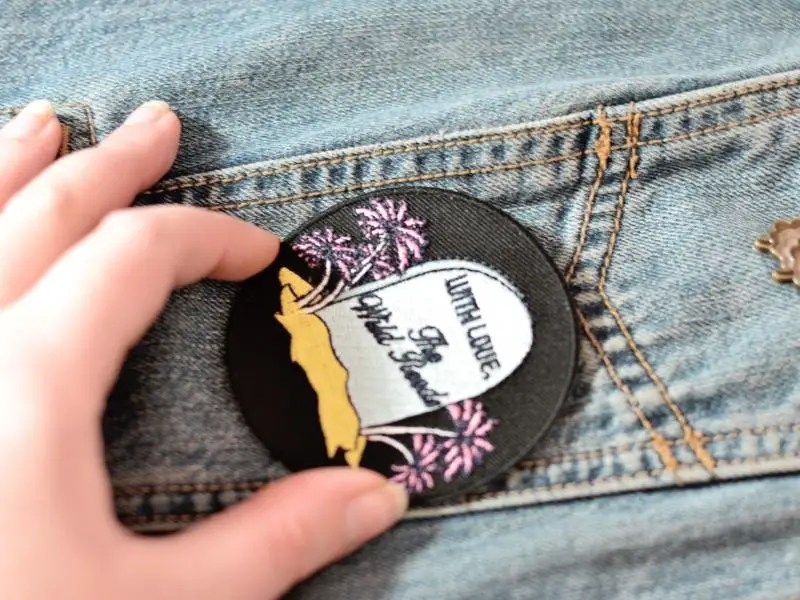
Can I Attach Patches to My Denim Jacket?
Yes, you can. Denim jackets are ideal clothes for sticking patches because they often don’t have patterns, so they have enough space. However, you should choose the right patch and technique to ensure it doesn’t come off after a while. For instance, magnetic patches are a big fail with denim jackets because of the fabric’s thickness.
What Are the Best Positions for Patches on Clothes?
You can place your patches in any place you want. But the areas that people notice the most are on the back, shoulder, or front of any top you wear. However, if you want to attach scout patches, they should go on the side of the chest.
Are Iron-On Patches Suitable for All Fabrics?
No, they aren’t. Thick fabrics like denim can withstand heat just fine, but other delicate fabrics like silk don’t react as nicely. So before attaching patches with a flat iron, you should test the heat on a tiny part of the fabric to see how it reacts.
What Is the Best Way to Attach Patches to a Leather Garment?
The best way to attach patches to a leather garment is by using a high-quality permanent glue. Using heat might burn the garment, and clutch pins might not be able to puncture leather. However, make sure to purchase a suitable adhesive because some low-quality types can cause discolorations on your garment after a while.
What Is the Best Method for Attaching Patches Without Sewing?
If you don’t mind having permanent patches without the choice of replacing them, then using fabric adhesive is the safest technique. It’s suitable for nearly all fabrics and lasts a long time. But if you want the freedom of replacing patches from time to time, then using hook and loop patches is best.
Final Thoughts
To sum up, just because you don’t know how to sew doesn’t mean you can’t remodel your clothes, hide a hole in the fabric, or hide a stain; no-sewing patches are here, and they’re your new best friends!
There are a lot of methods you use to attach patches to your clothes, like heat-pressing, using fabric adhesives, hard hook and loop tapes, or fusible webs.
And you can even get magnetic or pin-backing patches and have them attached in no time at all.
Comments
0 comments