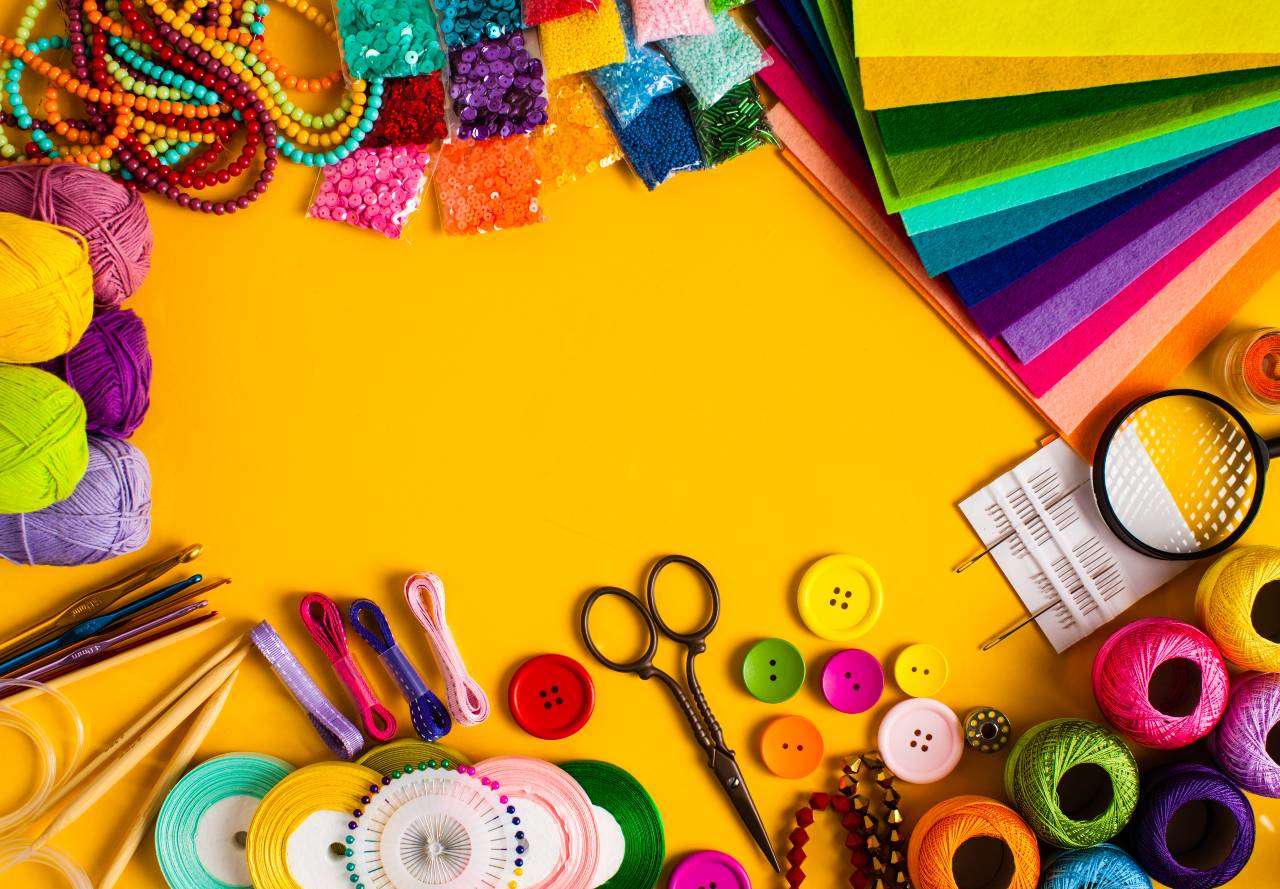
If you’re looking to make some art and craft pictures with your little one, there are lots of things you can do ““ and fun textures and mediums to make the most of.We’ve collected up some of the best ideas to help inspire you and get the creative juices flowing.
Fabric Cut Dog Picture
You can make a beautiful dog out of fabric and paper, and your child will really enjoy doing this. It’s a great way to bring new skills to your child’s picture-making process.
Materials
You’re going to need:
- White card
- Scissors
- Glue
- Black marker
- Fabric scraps
Step 1: Draw The Dog
You can either draw or print out a simple dog template. To draw the dog, make an oval for the body, a rounded head on top with a muzzle and big ears, and then draw two half-ovals on either side of the body for the hind legs. Add paws, a straight line for each front leg, and a fluffy tail off to the side.Next, draw in some eyes, and you can get crafting!
Step 2: Cut Up The Fabric
Help your child choose some fabric to cut into little pieces. It’s good to have a mix of different kinds of fabric, and also some different colors so you can make the eyes stand out from the body.This is a great way to use up scraps from past projects and make your fabric box a little tidier without throwing fabric away.
Step 3: Arrange And Glue
Spend a bit of time helping your child lay the fabric out on the outline you’ve drawn. They may want to overlap some parts or leave some spaces blank so the paper shows through.Don’t worry if some of your lines disappear behind the fabric pieces; you can always draw it back in on top once the picture is finished.
Step 4: Finish Off
Once your child has had enough, your textile dog is finished. You can touch up any pieces yourself, and ink back any lines that have got hidden behind the fabric, and then you can either cut the dog out and mount it on a different color, or hang it up as it is and admire your hard work!
Foam Fish Picture
Any child who enjoys seascapes and underwater life will love this foam fish picture, which you can make in an afternoon easily.
Materials
You’re going to need:
- Blue card
- Foam in several different colors
- Green tissue paper
- Seashells (optional)
- Scissors
- Glue
- Pens
- Glitter glue
Step 1: Cut Out The Fish
Start by helping your child to cut out a series of fish from your foam. If you use thin foam, you should be able to do this with craft scissors; make sure your child isn’t using them if they’re too young, or consider cutting some fish out in advance.If you have some red foam, you might want to also make a crab, which can sit at the bottom of the picture and wave its claws around.
Step 2: Add Seaweed
Tear up some thin strips of green tissue and help your child glue these in place to represent clumps of seaweed. You can add some dots of silver glitter glue to represent bubbles rising up from them.You can also use green pipe cleaners to make seaweed if you prefer.
Step 3: Glue The Fish On
Glue the fish around the scene, either in shoals or spaced out individually. Your child can draw faces and fins on the fish using pens if they like, or you can add other textures to make the fish more interesting ““ such as yarn tails or sequin bodies.They can also draw red claws on the crab, and add legs.
Step 4: Add Seashells (Optional)
A few seashells in the scene will make this ocean land feel complete. Glue them along the bottom, and consider drawing some little eyes on stalks to help these sea creatures come alive. Your child will love this.
Feathered Bird Craft
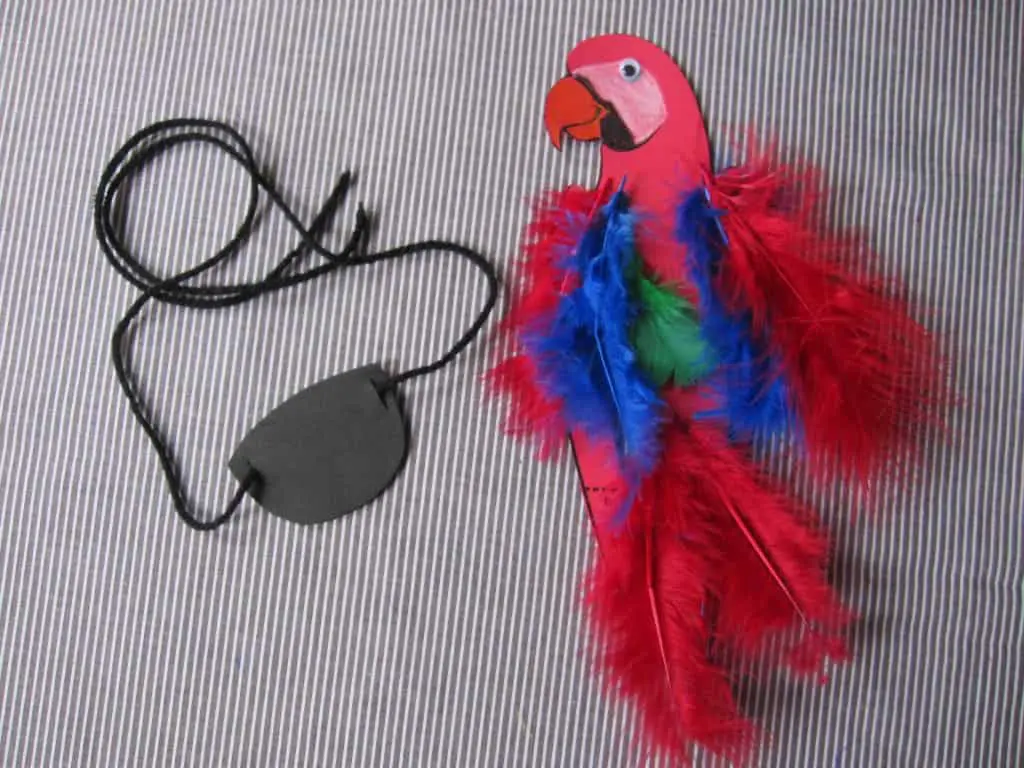 Source: https://www.diys.com/parrot-themed-crafts/ Craft feathers are great fun and come in every color imaginable ““ so why not do the obvious thing and create an amazing bird craft using feathers?
Materials
You’re going to need:
- 1 sheet of white card
- Lots of colored feathers
- Yellow card
- Googly eyes
- Scissors
- Glue
- Black marker pen
- Pencil
Step 1: Draw The Bird
Draw a bird for your child to work with. This can be very simple. Draw a large 8 on your white card, with the top circle a little smaller than the bottom one, and erase the line between the two circles. Next, add two half oval wings, one on either side of the body ““ and that’s all you need for the bird!Go over this with a marker so your child has nice, dark lines to work with.
Step 2: Add Feathers
Help your child arrange feathers all over the craft. They might want to do a different color for the wings or the head to make them stand out, or they just enjoy sticking random colors all over the bird.You can cut feathers smaller, but it will be quite messy, so it is best to have several different sizes of feathers.
Step 3: Add The Features
When your child is happy with the bird’s feathers, you’re going to glue both the googly eyes to the middle of the bird’s face, and then cut a beak out of the yellow card and stick this in place.Cut some little triangular feet and glue them to the bottom of the bird’s body, and then set the bird to the side to dry.
Pressed Flowers
If your child loves flowers and loves pressing flowers, this is a gorgeous way to preserve their blooms and make something beautiful from them. Once finished, this would look lovely displayed in a frame on a wall somewhere.
Materials
You’re going to need:
- A variety of pressed flowers in all different hues
- 1 piece of white card
- Pencil
- Black marker
- Glue
- Spray varnish
Step 1: Draw A Flower
In the middle of your paper, draw a flower or a couple of flowers in different shapes and sizes, and then go around the outline with your black marker. If your child wants to add stems, you’ll just need a little green paint or a green pen to fill them in, and then you can get started on the flowers!
Step 2: Glue The Pressed Flowers
Help your child glue the blooms they have pressed onto your drawn flowers. They can either cut the flowers into small pieces, pull off individual petals, or stick the whole blooms on. They can space them out or stick them close together ““ whatever they like. This craft is wonderfully free and creative.Your child might want to include other mediums and textures; if so, consider yarn for the flower outline, or to create the centers. Buttons and beads would also make a good change from the petals, and ribbons can add a silky sheen to the flower.
Step 3: Mount The Flowers
Once the flowers’ petals have dried and the glue is set, you can cut out and mount the flowers, and the craft is complete.
Button Fish Craft
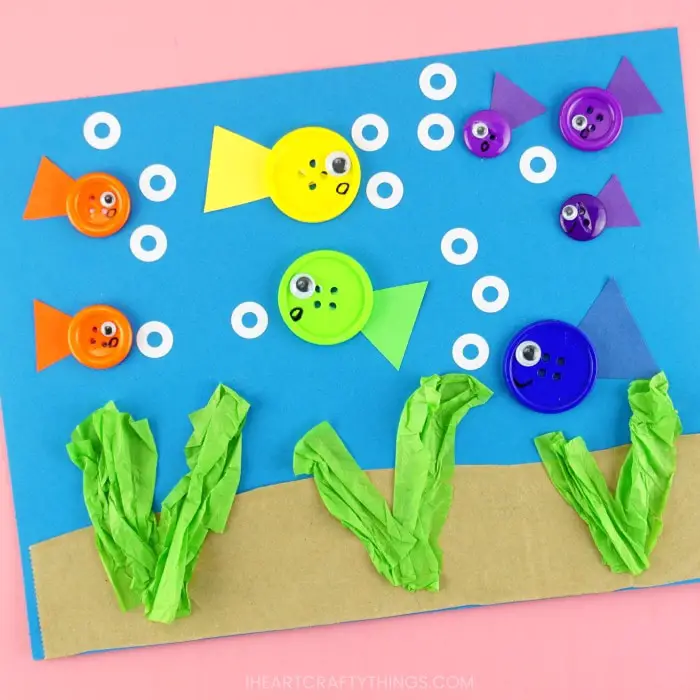 Source: https://iheartcraftythings.com/button-fish-craft-kids.htmlThis craft will require a lot of buttons and sequins, so if your craft box is looking a bit empty, it’s time to head to the store. Again, you can mix a whole lot of different mediums to make your fish exciting and crafty.
Materials
You will require:
- Blue card
- Different colored buttons
- Yarn or pipe cleaners
- Silver glitter glue
- Gold glitter glue
- Glue gun
- White glue
- Sequins
Step 1: Draw The Fish
Again, start this craft off by drawing a nice, large fish outline for your child to fill in with the buttons. You can draw a dorsal fin and a lovely trailing tail, or keep it simple and just draw a triangular tail, depending on how artistic you’re feeling and how old your child is.
Step 2: Choose The Eye
Get your child to choose a button to be the fish’s eye. The button should be reasonably large so that it will stand out and look the right size on the fish; it may also help to use a different color to the rest of the buttons.Once the eye has been chosen, glue it into place and then use the gold glitter glue to create an outline around it. You can also outline around the fin on the side of the fish’s body to make this stand out more.
Step 3: Start Gluing On Buttons
You can use either a glue gun or white glue for this craft; a glue gun will be much faster, but you will have to do all the gluing yourself unless you’re doing the craft with a child who is old enough to safely handle the hot glue. Hot glue can also result in a slightly messier finish.If you’re using white glue, you can just spread a layer all over one half of the fish’s body, glue the buttons to it, and then spread a layer on the other half and glue on the buttons. This stops the glue from drying too much while you’re still working.Help your child choose a good mix of large and small buttons, and add the odd sequin in to make the scales look shiny. You can also add glitter glue to the buttons to provide a bit more sparkle if your child wants to.
Step 4: Finishing Off
When you’ve finished gluing the fish together, add some silvery bubbles coming up from its mouth by putting a small dot of silver glitter glue, followed by successively larger dots rising to the top in a wiggly line.The craft will need a good while to dry, so put it on a flat surface in a warm space, and leave it alone. When the craft has dried, check the buttons are all firmly fixed and add a little more glue to any that are loose before hanging the picture up for everyone to admire.
Yarn Spiderweb
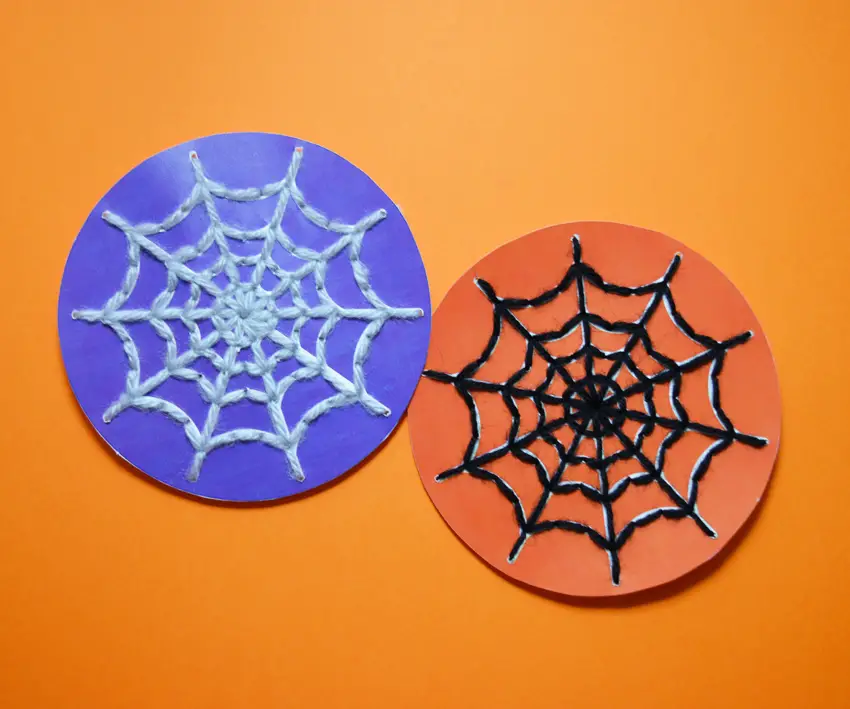 Source: http://makemakeco.net/portfolio/spider-web-sewing-cards/Yarn craft is great fun, too, and can be an easy way to introduce your child to sewing skills. You can do this with any piece of scrap cardboard, but it will look better on a piece of white or colored card.
Materials
You will require:
- An awl or large needle capable of punching holes through the card
- Pencil
- Colored yarn
- Embroidery needle
- Ruler
- Glue
- Card
Step 1: Draw Your Spider Web
You might want to get a picture of a spider web from the internet, as they can be surprisingly challenging things to draw. Use a ruler to make the supporting strands of the web nice and neat, and then draw the joins in. You can just use a pencil for this craft as you don’t need wide lines to follow.Next, punch holes at regular intervals along the lines of the web for your child to stitch the yarn through.
Step 2: Sew The Web
Cut some lengths of colored yarn and help your child thread the needle. Knot the yarn and go up through the first hole from the underside (you may wish to start in the center). Add a dot of glue to secure the yarn, and then sew through each hole, going up and down. When you get to the end of the first structural line, your child can then reverse direction, filling in the holes where the stitches are underneath, and tie the yarn off.Use different colored threads for each structural strand, making a beautiful rainbow spider web. To sew between the strands, show your child how to leave the yarn loose to create a slight curve, rather than pulling it tight. Again, they can use different colors or one continuous strand.
Conclusion
Arts and crafts pictures are amazingly good fun, and you can use all sorts of different textures and shapes, and colors to create beautiful art on your paper. These pictures can then be hung up and displayed to show off your child’s artistic talent.
Comments
0 comments